Tuesday 15 January 2019

Still going!!

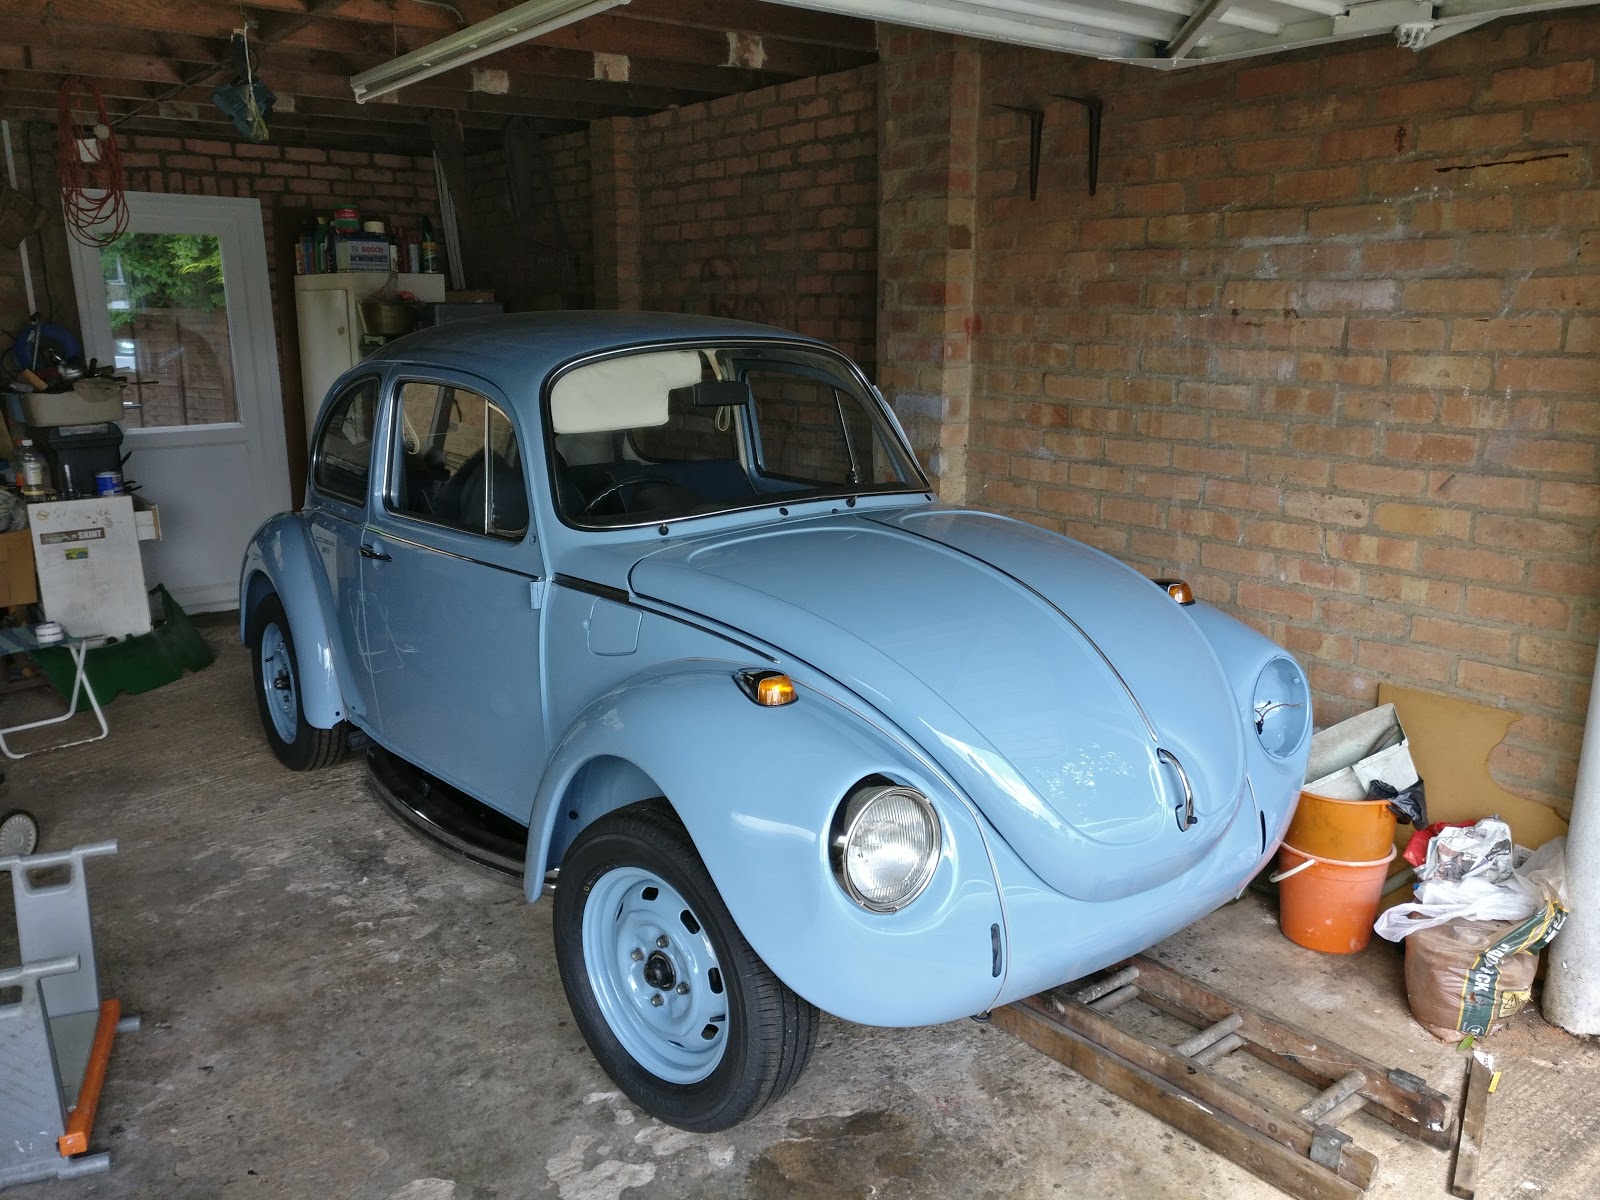
Hi everyone. I know there are a few people who follow my blog. Just to let you know that we are still going on the car, and this year it will be on the road! I had hoped to have it running in 2017 but with the problems with the engine not lining up in the engine bay we didn't quite get there before the arrival of my baby daughter in July 2017. So with my daughter being nearly 18 months we now have a bit of time to start working on it again. We have moved it out of my mums garage back to our house and done a few little bits and pieces on it. It is away at a garage this week having the engine alignment sorted. Looks like it could be panel alignment too so be interesting to see what is done.

The sun visors have been recovered again, this time much better after replacement ones didn't seem to fit. Side skirts are welded and painted up ready to have the rubber put on and then underseal done.

So 2019 will be the year it is on the road. I want to try and get it to a show this year too. Having been to a classic car show in Jan i feel inspired to get back on to it and get it on the road now we have a bit more times on our hands

Sunday 11 June 2017

Engine in, bonnet and boot.

So last weekend was getting the engine in, A few jack and lot of work and eventually it was in. It was a much longer job and more work than expected to get it lined up and in. When it was in it started to become a bit clearer why. The engine is a cm of where it should be Slightly over and up from what is expected. We believe the car had a bump at some point and probably having been hit from behind has bent the floor back end supports a little so we will need to jog them slightly to get it to fit nicely as currently it is a bit close to one side and the tailpipes will rub the body work. However the engine is looking great with the powder coated tinware.

Powder coated tinware looking good
 This weekend we fitted the bonnet and boot. Both took a bit of time to adjust and sort to make sure they don't scrap the body work at all, once on they were looking great and it really does look like a car again.


So that is all the major work done, Lots of finishing touches to be added like sorting the engine, getting it running, bumpers and side skirts but really is starting to get there now. 

Visors!

I had recovered the original visors with some of the old roof lining but this was hard and they looked a bit saggy in places so i decided to buy some new ones. I ordered them and was excited to fit them when they arrived. However they were to short! A bit of back and forth with the suppliers and they even checked that they should fit a 1303 which they should but as you can see they are about 1-1.5cm to short. No idea why and no one has managed to figure it out yet which is a shame. Having to return them to the shop as they just don't fit but apparently they are the right ones for my car. Looks like i might have to have another go at recovering the originals. I might look for a different fabric that will be easier to sew then the plastic feel of the old headliner.
New visors are just to short


Windows, wings and doors.

As i am catching up on these posts i am not quite sure if i am doing it in quite the right order but it has started to come together nice and quickly now which is great and starting to look like a car again.

The fuel tank is painted and in the car, not completely fitted yet but ready to go. We spent a day putting the windows in the car, The first took a bit of time and was a pain but it was our learning curve and we soon got quicker with the others. All windows where fitted in a day

Fuel tank and windows in.
 Next to go on was the wings, this is something that really does give it the beetle look. I opted for a grey wing beading to work with the colour of the paint and this was a success. With the wings on it was time to wire in some lights, took a while to get them all working as they should be with testing them all out but all are working now.
Front wings on now, giving it that beetle look

Rear wings and lights on 

Lights working on the back and showing the back window in.
 Next to go on were the doors, I built up the windows on the doors first fitting in the quarter lights and getting the window winder mechanism in. The only think is i think i need to replace one as the teeth for the handle aren't grabbing it right, better to get it replaced now then trying to sort it later.
Also starting to get some chrome trim on as I work on polishing them up to make them nice and shiny after all the years of being on there. As with all beetles the door seal was a joy, it is like they make them as big and bouncy as possible so that the door can bounce back at you if it doesn't catch the lock. I remember the same with my first beetle. After a bit of adjusting and leveling the door went on ok.
Love the quarter lights on a beetle.

Rear side view. Looking like a car

Seats go in

It was time to get all the seats into the car. The rear seat sloted in nicely and looked great. I was nice at last to have a proper seat in the car and we sat there for a few minutes to admire it and try out the seatbelts 😃 
Rear seat fitted with door cards 
 So next where the front seats, after a quick check to make sure all the seat mechanism was in corrected the seat slotted in well. I am so pleased with how they look and they really compliment the interior of the car and work with the paint colour well. I did originally plan for denim fabric seats as this is something i always liked in the jeans car and also would work well with the denim paint colour. However i was concerned that the denim might wear a lot or even the colour come off onto light fabrics so when i found this woven blue fabric that gave a similar effect in the same colour as i wanted i opted for that. The grey piping sets it off nicely to. So what do you think of the seats i recovered from scratch?

Engine build

Hubby has been working hard on the engine rebuild. This is one part i have left up to him to do as he knows best with this and i know he will do a great job. He has put together the conrods and pistons and made sure everything is nicely balanced and all greased up just as it should be. 
 Moved it into his garage to build it together fitting it all into the engine casing and everything had a good clean before hand and all the bearing etc are new and a new clutch and fly wheel. Starting to come together really well

Interior continues

So after the headlining had gone in i continued with the interior fitting the carpets into the car. I bought simple black carpets to fit and with a bit of work they fitted really well and really pleased with the result. They didn't have a rubber edge strip across the doors like the last one did so i tool the strip from the old carpets and used them to fit the new carpets which worked really well.

Carpet all fitted into the car and looking really smart

New carpet fitted and looking smart.
As you can see from some of the earlier photos the interior is a dark denim blue colour fabric with accents of grey. I made the seat covers and covered the door cards myself. I even created piping to give a nice effect and did all the sewn panels and styling as the original were. I wanted a modern new take on the original seats in the colours and fabric that would work with the car and be a little different from the shop bought ones. I am so pleased with how they turned out, better than i could  have wished for and really proud i made them myself. I don't think people would be able to tell.

Rear seat and door cards in and seatbelts fitted.
Ended up getting some new seatbelts and the old ones were worn and the rear i hated the huge inertia bit being at the top in full view so i opted for static seatbelts so that they look nice and chances are they will have little use anyway.